Select Menu
Commands
A D V E R T I S E M E N T
We've already covered some
of the shortcut keys for the most often used commands:
Select All = Ctrl/Command-A
Deselect = Ctrl/Command-D
Reselect = Shift-Ctrl/Command-D
Inverse = Shift-Ctrl/Command-I
Next is the Color Range
command. This is another way of making selections based on color similarity, but
unlike the magic wand tool, you have a bit more control and can refine your
selection visually. To learn more about this command, see the online help file
or page 142 of the Photoshop 5.0 User Guide or page 144 of the
Photoshop 6.0 User Guide.
 The
feather command allows you to soften or blur the edges of your selection by a
specific number of pixels. You can experiment with it on one of your own images
to create a soft vignette effect. Here's how: The
feather command allows you to soften or blur the edges of your selection by a
specific number of pixels. You can experiment with it on one of your own images
to create a soft vignette effect. Here's how:
- Make an oval
selection
- Feather by 10-20
pixels
- Invert the selection
- Fill with a
background color.
The feather command is
usually fine when you just need to feather the selection by a few pixels, but in
most cases, you need a more visual approach. I'll be showing you a better
alternative to the feather command when we discuss Quick Mask Mode very soon.
Next up is the Modify
submenu which includes the commands Border, Smooth, Expand, and Contract.
Border creates a
selection that frames the border of previously selected area. The border can be
any size from 1 to 64 pixels. See the example below where the circular selection
was converted to a border selection of 10 pixels.

Original Selection |

Converted to 10 pixel border selection |
 You'll
rarely ever use this command, and if you fill the border selection with
a color you'll see why. It makes a fuzzy selection. You'll
rarely ever use this command, and if you fill the border selection with
a color you'll see why. It makes a fuzzy selection. |
 If
you wanted to outline a selection with a hard edge, you'd be better off using
the Stroke command. If we step back in the history palette to before we
used the border command, we can choose Edit > Stroke. If
you wanted to outline a selection with a hard edge, you'd be better off using
the Stroke command. If we step back in the history palette to before we
used the border command, we can choose Edit > Stroke.
 Set
the width and the location of the stroke, and you get a nice hard-edged border
like the one to the right. Set
the width and the location of the stroke, and you get a nice hard-edged border
like the one to the right.
The Smooth command
smoothes out any sharp angles in your selection. In the example below, the first
outline resulted from a freehand selection with the lasso tool that was stroked.
The second outline is the same selection after apply the smooth command with a
radius of 10. For the third outline, smooth was applied again with a radius of
10.

Try this out on your own. Remember, you can stroke a selection and then move the
selection over by clicking inside it and dragging.
Expand and
Contract are pretty self explanatory. Expand makes the selection larger by a
specific number of pixels; and contract makes the selection smaller by a
specific number of pixels.
Original
Selection
 |
Expand
Selection 10 pixels
 |
Contract
Selection 10 pixels
 |
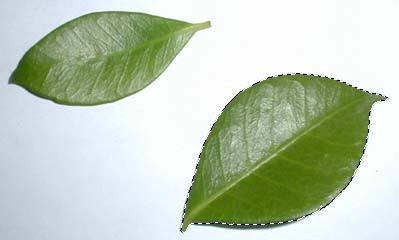
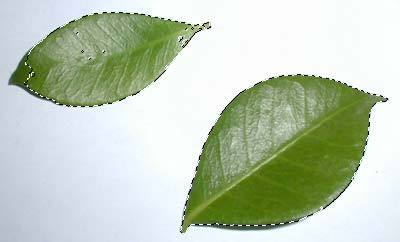
The Grow command
expands a selection to includeadjacent areas that are similar in color to
the current selection. The Similar command expands a selection to include
non-adjacent areas that are similar in color. In the example here, I
first made a rough lasso selection of the inside of the leaf.
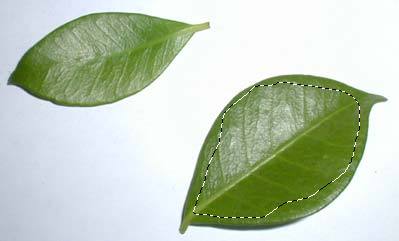
Using grow, the selection
expands to the entire leaf as shown below.
Using similar, the
selection expands to include most of both leaves.
This is similar to the
contiguous option for the Magic Wand tool. Grow is equivalent to having
contiguous checked, and similar is the equivalent of have contiguous unchecked.
Take some time to
experiment with all these commands on your own before moving on to learn about
transforming selections.
|
