Gradient,
Pattern & Line Tools
A D V E R T I S E M E N T
The Gradient tool shortcut
is G. In Photoshop 5.x, Shift G toggles the five types of gradient
fill types. In Photoshop 6, the gradient fill type is selected from the option
bar and Shift G toggles between the gradient and paint bucket tools.
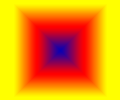
There are five types of
gradients: Linear, Radial, Angle, Reflected, and Diamond.
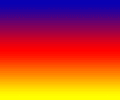 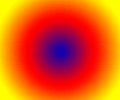
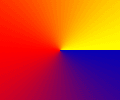 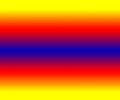 
 The
gradient tool options allow you to choose and edit gradients. As with all the
tools, the options can be accessed by double clicking the toolbox button in
Photoshop 5.x, and via the options bar in Photoshop 6. The
gradient tool options allow you to choose and edit gradients. As with all the
tools, the options can be accessed by double clicking the toolbox button in
Photoshop 5.x, and via the options bar in Photoshop 6.
The transparency checkbox
enables gradients with transparency, otherwise the transparent areas are filled
with the neighboring color.
Dither adds a slight bit
of noise to the gradient to reduce banding when gradients are printed.
Reverse flips the order of
colors in the gradient.
The gradient style is
selected from the menu on either the options palette or the options bar. In
Photoshop 5.x, the edit button allows you to edit and create new gradients. In
Photoshop 6, clicking on the gradient preview in the options bar brings up the
Gradient Editor.
Pattern Fills
You can also use patterns as paint and fills in Photoshop. Patterns are handled
a bit differently in Photoshop version 5 and version 6.
In version 5, you need to
define a pattern every time you want to use a different one. Defining a pattern
is simple, just make a selection and choose Edit > Define Pattern. Anytime a
pattern is defined, the tools and commands that required a pattern fill will
show that option. When you want to use a different pattern, just select it and
choose the define pattern command again. Note that you can only define a pattern
from a non-feathered rectangular selection.
In Photoshop 6, pattern
fills are selected from a menu of patterns in the options bar. To add a new
patterns you just open the image and choose Edit > Define Pattern. You can also
define a pattern from a portion of the image by first making a selection.
As mentioned previously,
patterns can but used as fills with the paint bucket and the Edit > Fill
command. You can also paint with patterns using the Pattern Stamp
 tool. This tool shares the toolbox location with the rubber stamp (AKA clone)
tool.
The pattern stamp works
like a paintbrush, but instead of solid color paint, it paints with the
currently defined pattern. The aligned check box causes your pattern to line up
even if you stop one brushstroke and start a new one. When aligned us unchecked,
the starting point of the pattern is reset each time you make a new stroke.
The Line Tool

The line tool is used to create straight lines and arrows.
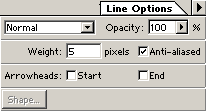
In Photoshop 5, the line
tool short cut is N and the toolbox location is shared with the Pencil
tool. The line width and arrowhead locations can be adjusted through the options
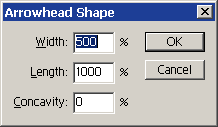
palette in Photoshop 5.x. When arrowheads are selected, you can modify the arrow
shape by clicking the shape button.
 In
Photoshop 6, the line tool is shared with the Shapes tool. In the options bar,
you can choose whether to create the line as a shape layer, a path, or a filled
region. Since we haven't discussed shapes or paths yet, you may want to stick to
creating lines as filled regions for these lessons, but feel free to experiment
with shapes and paths on your own. When the line tool is active in the options
bar, you can click the arrow next to the shape buttons to invoke the geometry
option where you can turn arrowheads on or off and adjust the shape and size of
the arrowheads. In
Photoshop 6, the line tool is shared with the Shapes tool. In the options bar,
you can choose whether to create the line as a shape layer, a path, or a filled
region. Since we haven't discussed shapes or paths yet, you may want to stick to
creating lines as filled regions for these lessons, but feel free to experiment
with shapes and paths on your own. When the line tool is active in the options
bar, you can click the arrow next to the shape buttons to invoke the geometry
option where you can turn arrowheads on or off and adjust the shape and size of
the arrowheads.

Here's an example of the
variety of arrowhead shapes you can create by changing the width, length, and
concavity.
All the other painting
tools require you to select a brush. Continue on to the next page to explore
brushes and the brushes palette.
|
