This chapter contains a few easy examples to learn working with QuickCG and
explore all it's functions.
The previous chapter contained a table with all the functions of QuickCG, but
this chapter will provide much more details about these functions.
The main function
QuickCG currently exists out of 6 files:
- QuickCG.cpp: this contains all the functions of QuickCG
- QuickCG.h: #include this header file in all *.cpp files where
you want to use QuickCG's functions
- Q3DMath.cpp: contains the 3D functions of QuickCG (those aren't
discussed here, but in the 3D Basics chapter)
- Q3DMath.h: #include this if you want to use the 3D functions
and classes
- main.cpp: in this file you can type the code of the examples of
this tutorial.
- QuickCG.dev: this is the project file of DevC++ and not
required for QuickCG
The main.cpp file begins with including a few headers: QuickCG.h so that the
QuickCG functions can be used, SDL.h so that SDL functions can be used, and a
few standard C++ headers that come in handy sometimes.
Below these header inclusions is where you can put the code of the examples
given in all the articles of this tutorial. Leave the inclusions intact (or add
some if you need it).
If the example code has no main function, you have to add it yourself, and then
copypaste the example code inside the main function as follows:
int main(int argc, char *argv[])
{
    PUT THE CODE HERE!
} |
If the example requires multiple functions (for example the recursive functions
in the recursion trees chapter), a main function is already included in the
example so you can simply copypaste everything into the main.cpp file below the
header inclusions, and it should compile and run perfectly.
The Basic Screen Functions
The basic screen functions of QuickCG allow you to set up a window, plot pixels
on it, view the results and clear it again.
The screen(int width, int height, bool fullscreen, char* text) function
sets up the graphical screen. The integers width and height are
the width and height of the screen respectively. The boolean fullscreen
allows you to choose whether or not you want to go fullscreen: if you set it to
0, the graphical output will be in a window, if you set it to 1, it'll go
fullscreen. The string text is the caption or title of the window.
If you want to go fullscreen, you have to make sure you use dimensions your
videocard supports, for example dimensions like 640*480, 1280*1024 or 400*300
are supported, but 123*548 isn't. In windowed mode, all resolutions are
supported, even something like 1001*23.
After setting the screen, two global integer variables w and h
have been set to the width and height of the screen respectively. These
variables were given such short names, and are made global, because they're
often used in mathematical expressions in the examples, and it's not without
reason that in mathematics and science single symbols are used for constants and
variables as well.
In screen coordinates, the coordinates (0, 0) represent the top left of the
screen, and (w - 1, h - 1) the bottom right. So unlike a mathematical plot, in
screen coordinates increasing y represents a lower position.
The pset(int x, int y, ColorRGB color) function plots a single pixel at
location x,y with given RGB color: ColorRGB color has 3 components r, g, b which
are values between 0 and 255. Make sure that location x, y is actually on the
screen, x and y should not be negative and should be smaller than w and h (the
width and height of the screen).
The redraw() function uploads all pixels you have drawn to the
videocard, so that you can see them. If you only set up a screen and plot some
pixels to it, you won't see the pixels yet. Only after using redraw you will.
This function is relatively slow though, so don't call it after every single
pixel you draw, but only at the end after everything has been drawn.
The void cls(ColorRGB color = RGB_Black) function clears the whole
screen at once to the given RGB color. If you give no color, it'll be cleared to
black. Normally if you plot pixels, then redraw, then plot some more pixels, and
then redraw again, the first pixels will still be there as well if the new
pixels were drawn at other positions. If you don't want this, use cls to clear
the first pixels.
Here's again the same example of the previous chapter, that uses all these
functions (except cls):
int main(int argc, char *argv[])
{
    screen(256, 256, 0, "Small Test Script");
    for(int x = 0; x < w; x++)
    for(int y = 0; y < h; y++)
    {
        pset(x, y, ColorRGB(x, y, 128));
    }
    redraw();
    sleep();
} |
The output looks like this:
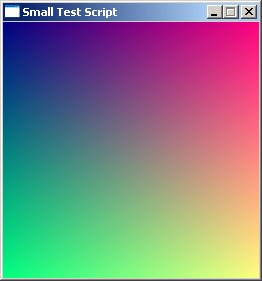
The program goes to every pixel of the window, and gives it a different color
based on what it's coordinates are, giving this color pattern.
Non Graphical Functions
The non graphical functions take care of things like input, program flow, etc...
The sleep() function pauses the program until you press a key, or
closes it if you press the close button of the window.
The function waitFrame(float oldTime, float mspf) is made to be handy
in cases where you want to limit an effect to a maximum amount of frames per
second. The parameter oldTime is the time of the previous frame after calling
waitframe that frame, and mspf is milliseconds per frame. An example of using it
could be:
oldTime = time;
waitFrame(oldTime, 50);
time = getTicks(); |
The value oldTime is then always the time of the previous frame after calling
waitframe, and the waitframe function will consume the part of the 50
milliseconds that wasn't used up yet by the rest of the code of this frame. This
function also uses SDL_Delay internally so that it frees CPU time for other
applications.
The bool
done() function returns true if the user presses escape or the
close button of the window. This function can be used if you want your program
to have a main loop that ends if the user wants to quit the program, for example
like this:
screen(256, 256, 0, "Done?");
while(!done())

{
    //do some stuff here

} |
The
end()function immediately ends the program when called.
The
readKeys()function lets SDL check what keys are pressed, and stores
the result in an array
inkeys[]. You can then check in your program if
a key was pressed by checking if keyDown(NameOfTheKey) or
keyPressed(NameOfTheKey) is true. keyPressed returns true only once per time the
key is held down, while keyDown will keep returning true as long as it's held
down. A table with the names of all keys is in the previous chapter or in the
SDL reference. For example the "a" key is named SDLK_a and the right arrow
SDLK_RIGHT.
Note: when using "done()", then you don't need to call readKeys() anymore
because the done() function already calls it and calling it once per frame is
enough.
The function
long getTicks()returns the time since the program started
in milliseconds.
Here's an example that uses all these functions to allow you to move a circle
arround with the arrow keys with a certain speed, independent of the processor
speed:
int main(int argc, char *argv[])
{
    screen(400, 300, 0, "Movable Circle");
    float x = w / 2, y = h / 2; //the position of the circle; initially set it to the
	center of the screen
    float time, oldTime; //the time of the current and the previous loop
    while(!done())
    {
        //set the old time to the time of the previous loop
        oldTime = time;
        waitFrame(oldTime, 50);
        time = getTicks(); //get the current time
        readKeys(); //get the current keystate

        //if an arrow key is pressed, move the circle in it's direction at a speed of 50
		pixels/second
        if(keyDown(SDLK_RIGHT)) x += (time - oldTime) / 20.0;
        if(keyDown(SDLK_LEFT)) x -= (time - oldTime) / 20.0;
        if(keyDown(SDLK_UP)) y -= (time - oldTime) / 20.0;
        if(keyDown(SDLK_DOWN)) y += (time - oldTime) / 20.0;
        drawDisk(int(x), int(y), 20, RGB_Gray); //draw a grey circle with radius 20 pixels at
		the position of the ball
        redraw();
        cls(); //clear the screen so the old position of the ball becomes black again
    }
} |
First the screen function creates the graphical window. Then some variables are
initialized for the position of the ball, and the timing.
Then the main loop starts, the program will keep running and doing the
calculations inside the loop until you press escape or use the close button. In
this main loop, first the current time is calculated, and the previous time is
set in the "oldTime" variable. The time difference t-oldTime can then be used to
represent the time that passed between this and the previous loop.
Then the current keystate is gotten with the readKeys function, and the program
will then check if the right, left, up or down arrow are pressed, and if one is
pressed, change the coordinates of the circle. Since the circle is moved (t -
oldTime) / 20.0 pixels, and the time is represented in milliseconds (1/1000th of
a second), the circle will move at 50 pixels/second, no matter how fast or slow
the computer is.
Finally, the program draws the circle with the disk command (to make it filled),
redraws the screen so that you can see it, and then clears the backbuffer so
that the next frame can be drawn.
Floating point numbers are used for the position of the circle, because a high
precision is required for the timing. In the disk function call, the location
has to be converted to integers so that it can be used as screen coordinates
though.
The 2D Primitives
The following functions draw primitives like lines and circles on the screen.
These are not standard SDL features (except the filled rectangle), but have to
be done pixel by pixel. These functions use optimized algorithms to draw the
line or circle as fast as possible with pure integer calculations. How these
functions work is explained in another chapter of this tutorial. They were also
included in QuickCG so that you can easily use them for other programs that need
them (like the recursion trees).
bool drawLine(int x1, int y1, int x2, int y2, ColorRGB color)draws a
line from point (x1, y1) to point (x2, y2) with the given color using the
Bresenham algorithm. Make sure both points are inside the screen, or this
function won't draw the line and return 0 (use the clipLine function to clip
arbitrary lines to the screen). The line function return 1 if it could draw the
line successfully.
bool drawCircle(int xc, int yc, int radius, ColorRGB color) draws a
circle with it's center at location (xc,yc), and given radius and color. This
circle isn't filled. Again, it'll return 0 and draw nothing if the circle had
pixels outside the screen, and return 1 if it could draw the circle correctly.
bool drawDisk(int xc, int yc, int radius, ColorRGB color) draws a
filled circle with it's center at location (xc,yc), and given radius and color.
bool drawRect(int x1, int y1, int x2, int y2, ColorRGB color) draws a
rectangle with corners in x1,y1 and x2,y2, with the given color.
bool clipLine(int x1,int y1,int x2,int y2, int & x3, int & y3, int & x4, int
& y4): Use this function if you need to bring the endpoints of a line (or
corners of a rectangle) you're trying to draw to the inside of the screen. Give
the function a line with coordinates (x1,y1)-(x2,y2), and it'll return a line
with coordinates (x3,y3-x4,y4) that are on the edges or inside the screen, that
is, inside the rectangle (0,w)-(0,h). The variables x3, y3, x4 and y4 have to be
given to the function by reference, so for example use clipLine(x1, y1, x2,
y2, x3, y3, x4, y4), where x3, y3, x4 and y4 are normal integers that can
be changed by the function, to give the coordinates of the new line to those
variables. The function returns 1 if the line is on the screen and 0 if the line
isn't on the screen.
The following example will draw a clipped line on screen, and then also a
circle, disk and rectangle to show these commands in action as well.
int main(int argc, char *argv[])
{
    screen(400, 300, 0, "2D primitives");
    int x1, y1, x2, y2; //The initial line, too big for the screen
    int x3, y3, x4, y4; //Will become the clipped line
    x1 = -50; //This is outside the screen!
    y1 = -20; //This is outside the screen!
    x2 = 1000; //This is outside the screen!
    y2 = 1200; //This is outside the screen!
    clipLine(x1,y1, x2, y2, x3, y3, x4, y4); //the new line represents the part of the
	old line that is visible on screen
    drawLine(x3, y3, x4, y4, RGB_Red); //The newline is drawn as a red line
    drawCircle(100, 100, 30, RGB_Green); //a green unfilled circle
    drawDisk(200, 100, 20, RGB_Yellow); //a yellow filled circle
    drawRect(150, 150, 200, 200, RGB_Cyan); //acyan square
    redraw(); //make it all visible
    sleep(); //pause
} |
The output is as follows:
Color Conversions
These functions change the representation of a color from one color model to
another. The RGB model is used by the computer and the screen, while the HSL and
HSV color models are more intuitive for a human to select a color. These
functions aren't a feature of SDL but are explained somewhere else in this
tutorial, but were included in QuickCG so that you can easily use them in other
programs to get nice color gradients (for example to draw pretty fractals or
plasmas). More info on color models is in the color chapters of this tutorial.
The 4 color model conversion functions are:
ColorHSL RGBtoHSL(ColorRGB colorRGB);
ColorRGB HSLtoRGB(ColorHSL colorHSL);
ColorHSV RGBtoHSV(ColorRGB colorRGB);
ColorRGB HSVtoRGB(ColorHSV colorHSV);
Every color model has 3 parameters to describe the color. The ColorRGB, ColorHSL
and ColorHSV data types are all just dumb structs with 3 integers, the only
difference there is the names of the integers. The conversion functions allow
you to calculate the components of the returned color model out of the given
color model.
As an example, let's use both the HSLtoRGB and the HSVtoRGB functions to compare
the HSL and HSV color model with each other. More info on how these functions
work is in the Light and Color chapter.
int main(int argc, char *argv[])
{
    screen(512, 256, 0, "HSL versus HSV");
    ColorRGB color;

    for(int x = 0; x < 256; x++)
    for(int y = 0; y < h; y++)
    {
        color = HSLtoRGB(ColorHSL(x, 255, y)); //convert the color "hue=x, saturation=255,
		lightness=y" to RGB
        pset(x, y, color); //plot a pixel from the HSL model
        color = HSVtoRGB(ColorHSV(x,255, y)); //convert the color "hue=x, saturation=255,
		value=y" to RGB
        pset(x + 256, y, color); //plot a pixel from the HSV model
    }
    redraw();
    sleep();
} |
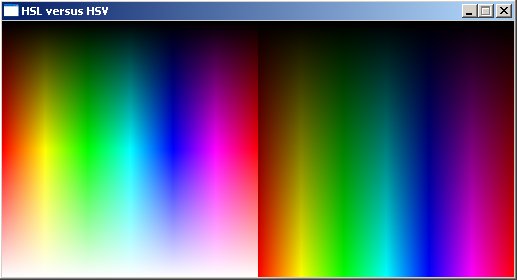
First using RGBtoHSL and then using HSLtoRGB on the result again, gives the
original values back.
There are also the functions
Uint32 RGBtoINT(ColorRGB colorRGB)and
ColorRGB INTtoRGB(Uint32 colorINT) which convert the RGB color to and from
a single integer value.
Bitmap Loading
SDL has a built in feature to load bitmaps, and so also QuickCG has a function
that uses this feature: loadBMP. There are two versions of it, one that stores
the image in a 3D array where each color component is put in a seperate 8-bit
char, and another version that stores the image in a 2D array where the RGB
color of each pixel is stored in a single 32-bit integer per pixel.
bool loadBMP(char *filename, ColorRGB *image, int w, int h) loads a
24-bit color BMP with given filename into the 2-dimensional array image[w][h].
If the BMP image is too small, the rest of the array is filled with patterns,
and if the BMP image is too large, the left top part of the BMP file is used to
fill the array. If the BMP file isn't found, or isn't valid, the whole array is
filled with a pattern.
The array contains the RGB color of every pixel. For example to use this
function to load a 64*64 BMP file, type: "ColorRGB image[64][64];
loadBMP("filename.bmp",image[0],64,64);" The function will return 1 if it
successfully loaded the image and 0 otherwise.
The other version of this function is bool loadBMP(char *filename, int
*image, int w, int h). This one stores the color as a 32-bit integer,
instead of ColorRGB. It loads a 24-bit color BMP with given filename into the
2-dimensional array image[w][h]. If the BMP image is too small, the rest of the
array is filled with patterns, and if the BMP image is too large, the left top
part of the BMP file is used to fill the array. If the BMP file isn't found, or
isn't valid, the whole array is filled with a pattern.
For example to use this function to load a 64*64 BMP file, type: "Uint32
image[64][64]; loadBMP("filename.bmp",image[0],64,64);" The function will
return 1 if it successfully loaded the image and 0 otherwise.
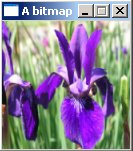
The following example will load a bitmap "test.bmp" of 128*128 pixels and draw
it on the screen. To get the program to work, you have to put such an image in
the same folder as the compiled binary of course.
int main(int argc, char *argv[])
{
    screen(128, 128, 0, "A bitmap image");
    ColorRGB image[128][128];
    loadBMP("test.bmp", image[0], 128, 128);

    //draw each pixel of the image
    for(int x = 0; x < w; x++)
    for(int y = 0; y < h; y++)
    {
        pset(x, y, image[x][y]);
    }

    redraw();
    sleep();
} |
You can also use full paths, for example
loadBMP("D:\pictures\1337.bmp",image[0][0],1337,1337)
If you want to use a single array to contain multiple textures, then the
parameter that represents the number of the current texture has to be the first
one of the array. You can then use it normally with the loadBMP function
separately for each texture, but have to add the extra array parameter with the
number of the texture.
Text Functions
QuickCG has a built in font, it doesn't have to load any image or file
containing the font, the font is a boolean array, bool font[256][8][8],
completely defined in the code. This font is the ASCII charset of IBM computers,
containing 256 characters of each 8*8 pixels. Here's the full ascii chart, with
the hex code of each character included, e.g. the symbol "j" has hex code A6, or
in decimal: 166.
int printString(const std::string& text, int x = 0, int y = 0, const
ColorRGB& color = RGB_White, bool bg = 0, const ColorRGB& color2 = RGB_Black)
draws a normal string of text. There are a lot of parameters with default
settings, so that you don't have to type all these parameters if you're
satisfied with the defaults.
- text is the string of text you want to print.
- x and y are the position in pixel coordinates of the
upper left corner of the string.
- color is the foreground text color
- bool bg can be used to turn the background on or off, if bg=0,
the background will be invisible, and if bg=1, the background will be opaque
- color2 is the background text color, if its turned on
- forceLength is the minimum length that should be printed, if the string
is shorter, it prints 0 characters behind it (useful if background is
enabled and want to draw over a certain fixed length).
When the text is too long and reaches the right side of the screen, the position
will jump one line lower and to the left of the screen again. If it reaches the
bottom, it'll continue at the top left of the screen.
The return value is h * x + y where x is x position of next letter, y is y
position of next letter and h is height of the screen. This return value is
useful to find the start location for a possible next print command that should
be behind the previous text: x coordinate is then "returnValue / h", y
coordinate is "returnValue % h". See the example below how this works.
The print function allows printing arbitrary variable types (as long as they
can be converted to std::string using a std::stringstream). Apart from the
value, it shares the same parameters as the printString function.
template<typename T> int print(const T& val, int x = 0, int y = 0, const
ColorRGB& color = RGB_White, bool bg = 0, const ColorRGB& color2 = RGB_Black,
int forceLength = 0)):
void drawLetter(unsigned char n, int x, int y, const ColorRGB& color =
RGB_White, bool bg = 0, const ColorRGB& color2 = RGB_Black); Prints a
single character given its ascii code.
Using the return value of the print functions is handy if you want to draw
multiple texts behind each other and don't want to update the coordinates
manually each time you change the texts (making it longer or shorter), or if you
print a number and don't know yet how long it'll be and want to print something
behind it. This is used in the "All your base..." part, pos is set to the return
value of the print function every line and used for the parameters of the next
line.
Here's an example that uses all these functions.
int main(int argc, char *argv[])
{
    screen(256, 256, 0, "Text");
    //draw some texts
    print("Hello World!");
    print("I am spooky green text!", 20, 20, ColorRGB(0, 255, 0), 1,
	ColorRGB(0, 128, 0));

    //draw an integer variable
    int number = 1337;
    print(number, 16, 40, ColorRGB(0, 255, 255));

    //draw a floating point variable
    float pi = 3.1415926535897932384626433832795;
    print(pi, 0, 8);

    //draw every single character of the font
    for(int x = 0; x < 16; x++)
    for(int y = 0; y < 16; y++)
    {
        drawLetter(x + 16 * y, 100 + x * 8, 100 + y * 8, ColorRGB(255, 255, 255), 1,
		ColorRGB(255, 0, 0));
    }

    //draw multiple texts in a row easily by using the return value
    int pos;
    pos = print("All", 0, 70, RGB_Red);
    pos = print("your", pos / h, pos % h, RGB_Green);
    pos = print("base", pos / h, pos % h, RGB_Blue);
    pos = print("are", pos / h, pos % h, RGB_Yellow);
    pos = print("belong", pos / h, pos % h, RGB_Cyan);
    pos = print("to", pos / h, pos % h, RGB_Magenta);
    pos = print("us!!", pos / h, pos % h, RGB_White);

    redraw();
    sleep();
} |
And it outputs the following:
Text Input
The text input functions allow you to enter a string or other variable type from
within the program. The commands print the message at given position with the
given color and background, and allow you to type the char, string or number
after the message.
The following example shows how to use the functions:
int main(int
argc, char *argv[])
{
    screen(256, 256, 0, "Input Text");
    //input a string
    std::string someText;
    getInputString(someText, "Enter some text:", false, 0, 0);
    //input an integer
    int someInteger = getInput<int>("Enter an integer:",
	false, 0, 8);
    //input a double
    double someDouble = getDouble<double>("Enter a number:",
	false, 0, 16);
} |
Here's the result after typing something and pressing enter 3 times (after the
third enter the program closes):
(deprecated screenshot)
drawBuffer
The drawBuffer(Uint32 *buffer) function draws a whole 2D array of
pixels at once. This is much faster than using pset for every pixel separately.
The buffer to draw has to be a 2D array with exactly the same size as the
screen, and with the RGB color values stored in a single integer. To convert an
RGB color to the integer value, use colorINT = B + 256 * G +
256 * 256 * R. To convert it back to RGB, use R =
(colorINT / 65536); G = (colorINT / 256) % 256; B = colorINT % 256. This
is exactly what the RGBtoINT and INTtoRGB functions do.
So create the array with
and after filling it with colors, draw it with br>
If you're emulating a palette, it's handy to create the palette's colors in the
BGR order in an integer as well, an example of this is in the Fire Effect
article.
.
Reproduced with permission.